Here, we will tell you “How to Add Table of Contents to WordPress Website”.
You can easily add table of contents in the following steps.
Step 1 – Install ‘Easy Table of Contents’ plugin.
Step 2- Choose where you want to add the table of contents.
Let us see how to add table of contents in WordPress website-
Step 1 : Install the ‘Easy Table of Contents’ plugin.
To install the plugin, go to WordPress Dashboard Add New Plugins | Now search for ‘Easy Table of Contents’ and click on ‘Install’ and ‘Activate’.
Once you have installed the plugin, proceed to the next step.
Step 2: Choose where to add the Table of Contents.
To Add Table of Contents Go to WordPress Dashboard Settings Table of Contents
Now enable the section where you want to add table of contents.
As you want to add it to the post, enable ‘Post’ and click ‘Save Changes’.
Once you’ve enabled, you’ll need to add the table of contents. Then go to WordPress Dashboard Posts All Posts
Now select the post for which you want to add table of contents.
Now scroll down and enable ‘Insert Table of Contents’
Next, you need to select the titles of your posts that you want to appear on your table and click ‘Update’.
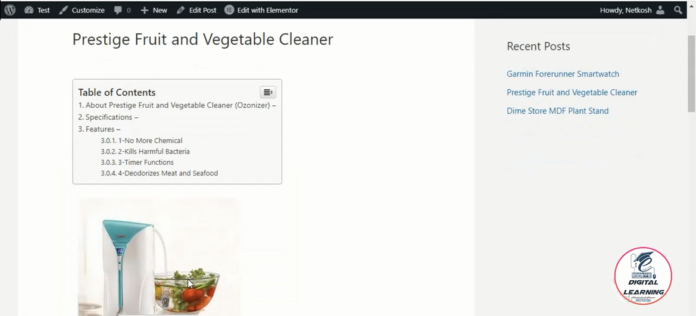
So now you have successfully added the table of contents to your blog post.
Now instead of adding Table of Contents to each post, you can automatically add Table of Contents to all posts at the same time.
So to do that, go to WordPress Dashboard Settings Table of Contents
Now go to ‘Auto Insert’ and enable ‘Posts’.
After enabling it, click on ‘Save Changes’
So now you have successfully added the Table of Contents to all your blog posts.
Adding Table of Contents to the Sidebar –
Go to WordPress Dashboard Appearance Widgets, now drag and drop the Table of Contents widget to the sidebar. Now just give it a title and click ‘Save’ and ‘Done’
And now your table of contents will be added to the sidebar.
Table of Contents
Watch Video - How to Add Table of Contents to WordPress Website